How To Clean Your Washer Machine DIY
Your washer is one of the hardest-working appliances in your home. Every week, it spins, agitates, and rinses away dirt, sweat, and detergent. But over time, washers themselves can get dirty.
Mildew, soap scum, and trapped odors can build up in the drum, seals, and detergent dispensers, leaving your clothes smelling less-than-fresh. Cleaning your washer regularly isn’t just about hygiene — it keeps your clothes smelling clean, improves efficiency, and prevents mold from taking hold.
Here’s a complete, step-by-step guide.
🧰 What You’ll Need
| Item | Purpose |
|---|---|
| White vinegar | Dissolves soap scum and kills mildew |
| Baking soda | Helps deodorize and scrub gently |
| Soft cloth or sponge | Clean seals, drum, and dispensers |
| Toothbrush | Scrub tight spots |
| Warm water | Rinsing |
| Gloves (optional) | Protect hands from cleaning solution |
🚿 Comprehensive Guide to Washer Cleaning
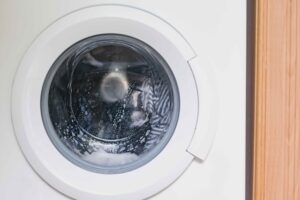
Step 1: Check the Washer and Unplug It
Prioritize safety! Before cleaning, always unplug your washer.
-
Empty the drum of any laundry.
-
Examine by opening the door:
-
Check the rubber gasket for mold.
-
Look for hardened soap in the detergent dispensers.
-
Examine the drum for residue, streaks, or mineral deposits.
-
💡 Tip: Take pictures before cleaning so you can identify trouble locations later.
Step 2: Use Vinegar to Run a Hot Water Cycle
Over time, minerals, detergent, and soap accumulate. These are naturally dissolved in a hot water cycle with vinegar.
-
Select the longest and hottest cycle on your washing machine.
-
Directly pour two cups of white vinegar into the drum.
-
Begin the cycle and allow it to fill and stir.
-
If at all feasible, stop in the middle and leave the vinegar for 15 to 20 minutes to break down any residue.
-
Go back and finish the cycle.
💡 Additional Information: Because vinegar is acidic, it dissolves mineral deposits and buildup without damaging rubber or metal components. The soap scum dissolves as much as possible thanks to the hot water.
Step 3: Clean the Detergent Dispenser
-
Bleach, fabric softener, and detergent build up in the pan.
-
Take out the tray all the way.
-
For ten to fifteen minutes, soak it in a dish of warm water and vinegar.
-
Brush all nooks and crannies with a toothbrush.
-
Before replacing, make sure everything is completely dry and rinsed.
💡 Tip: To avoid residue from influencing subsequent washes, wipe the tray’s detachable inserts individually.
Step 4: Clean Rubber Gaskets and Seals
-
Bacteria and mildew thrive in the rubber door gasket.
-
Use a gentle cloth soaked in a 1:1 vinegar-water solution to wipe.
-
To get rid of any water, lint, or debris that has become trapped, pull back the gasket’s folds.
-
For tough areas, use a toothbrush.
-
Use a fresh towel to completely dry.
⚡ Pro Tip: Since mildew grows in folds, prevention is preferable to eradication. Do this once a month.
Step 5: Start a Cycle of Baking Soda
-
Baking soda cleans the drum softly and deodorizes it.
-
Evenly distribute ½ cup of baking soda into the drum.
-
Without clothing, run a brief hot water cycle.
-
If odors continue, repeat.
💡 Extra Information: Baking soda, particularly in places with hard water, neutralizes residues and maintains the drum’s fresh scent.
Step 6: Clean the Hoses and Exterior
-
Use a moist towel and mild soap to clean the outside.
-
Dry completely to avoid corrosion or stains.
-
Examine the connectors and hoses, cleaning any dirt or detergent accumulation.
-
Remove any lint or debris and inspect the drain filter, if one is present.
⚡ Quick Tip: To clean the area behind the washer where dust collects, keep a tiny brush close at hand.
Step 7: Examine, Put Back Together, and Test
-
Put the door gasket and detergent tray back together.
-
Make sure the hoses are fastened firmly.
-
To check for leaks, plug the washer in and run a brief water-only cycle.
-
After cleaning, leave the door slightly open to avoid moisture accumulation.
💡 Advice: Check once a month to spot any early indications of mold, mildew, or accumulation.
Step 8: The Significant Impact of an Air Purifier
The thing that most people overlook is that even after your washer has been thoroughly cleaned, the air in your laundry room may still contain moisture, mildew spores, detergent volatile organic compounds, and tiny lint particles.
I had to learn this lesson the hard way. My washer’s drum, seals, and detergent tray were all immaculate after I had cleaned it till it sparkled. However, the air felt thick and a little musty when I returned to the laundry room the following day.
I made the decision to put a household air filter close by. The transformation was striking:
-
The heavy, moist scent disappeared in a few of hours.
-
Invisible airborne particles and dust were recorded.
-
Suddenly, wash day felt clean, light, and fresh, almost like entering a hotel laundry facility rather than a soggy basement.
An air purifier takes care of the invisible, while cleaning the washer takes care of the visible.
Consider this:
-
Detergent, moisture, and mildew odors go.
-
Particles in the air that might drop on recently laundered clothing are eliminated.
-
For you and your family, your laundry space feels healthier, fresher, and cleaner.
It’s the trick that turns doing laundry from a drudgery into a fun and rejuvenating activity.
Step 9: Keep the Laundry Area Fresher and Cleaner
-
Use high-efficiency detergents to lessen soap accumulation.
-
To prevent trapped dirt from being redeposited, do not overload the washer.
-
Every week, clean the gasket and drum.
-
Run cycles of vinegar and baking soda every month.
-
To let air flow, leave the washer door slightly open.
-
Maintain clean, toxin-free air by keeping an air purifier close by.
💡 Additional Information: Air purifiers do more than merely eliminate smells. They keep mold spores, lint, and volatile organic compounds (VOCs) from falling on your clean garments or accumulating in your laundry area.
Analyzing Typical Washer Issues and Their Probable Causes
| Problem | Probable Cause | Solution |
|---|---|---|
| The musty stench is back | Mildew in the drum or gasket | Repeat the vinegar/baking soda cycle and make sure the seals are clean |
| Clothes with detergent residue | Hard water or excessive detergent | Run an additional rinse cycle and use the suggested detergent |
| The washer isn’t draining | Clogged hose or drain filter | Examine and clean the hose or filter |
| The air has a wet fragrance | VOCs or mold in the air | Turn on a nearby air filter and increase ventilation |
Additional Advice for a Healthful Laundry Area
-
Make sure the washing area has adequate ventilation.
-
Avoid piling damp clothing because this promotes the growth of mold.
-
Clean up spills right away.
-
To capture dust, mold spores, and odors, use an air purifier equipped with carbon and HEPA filters.
-
Plan for a weekly spot inspection of the gaskets and seals and a monthly full cleaning.
Putting Everything Together
A fresh washer:
-
Makes clothing that smells better.
-
Performs better
-
Stops the growth of mold and mildew
A nearby air purifier:
-
Eliminates dust, VOCs, and smells
-
Enhances the quality of indoor air
-
Improves the comfort and health of your laundry area
When combined, they produce a genuinely clean and fresh laundry environment, which will benefit your family, your home, and your clothes every day.
Concluding Remarks
In detail:
-
Unplug, check, and get ready.
-
To get rid of accumulation, use a vinegar hot water cycle.
-
Clean the drum, seals, and detergent tray.
-
To deodorize, use a baking soda cycle.
-
Check filters, examine hoses, and wipe the outside.
-
Leave the door open, reassemble, and perform a test cycle.
-
To make the air you breathe better, put an air purifier close by.
Cleaning the air is just as vital as cleaning the washing. That’s the key to having a laundry room that is genuinely hygienic, fresh, and healthy.